Assignments
Intro to using Assignments
Assignments help your team track work across departments, from planning to scheduling to customer service. Here’s how to create and use them effectively in TransitChat.
How to Create an Assignment
Click “Take Action”
At the top right of the screen, you’ll see the Take Action button. Click it and select New Assignment from the dropdown.Fill in the Basics
Choose your agency, give your assignment a Title, and write a short Description so your team knows what it’s about.Start Adding Tasks
Once your assignment is created, you can begin adding To Do items (we call these “Checklist” items) to break down the work.
Link a Conversation to Your Assignment
Look below the Description
Right under the assignment’s description, you’ll see a button to add Conversations.Search and Select
Use the search bar to find the relevant Conversation, then click to attach it.Automatic Topic Linking
When you add a Conversation, any related Topics will also be linked automatically. This keeps everything organized and connected.
Navigating Linked Topics and Conversations
Once you’ve added Conversations or Topics, you can easily view them:
Use the tabs just below the assignment description to switch between Checklist, Conversations, and Topics.
Everything stays grouped together — so you’ll never lose track of what connects to what.
Working with the Checklist
➕ Add a To Do Item
Under the Checklist section, click the input that says “Add a task…”
Type your task title (e.g., "Send email to planning team")
Click Add — your task will appear at the bottom of the list.
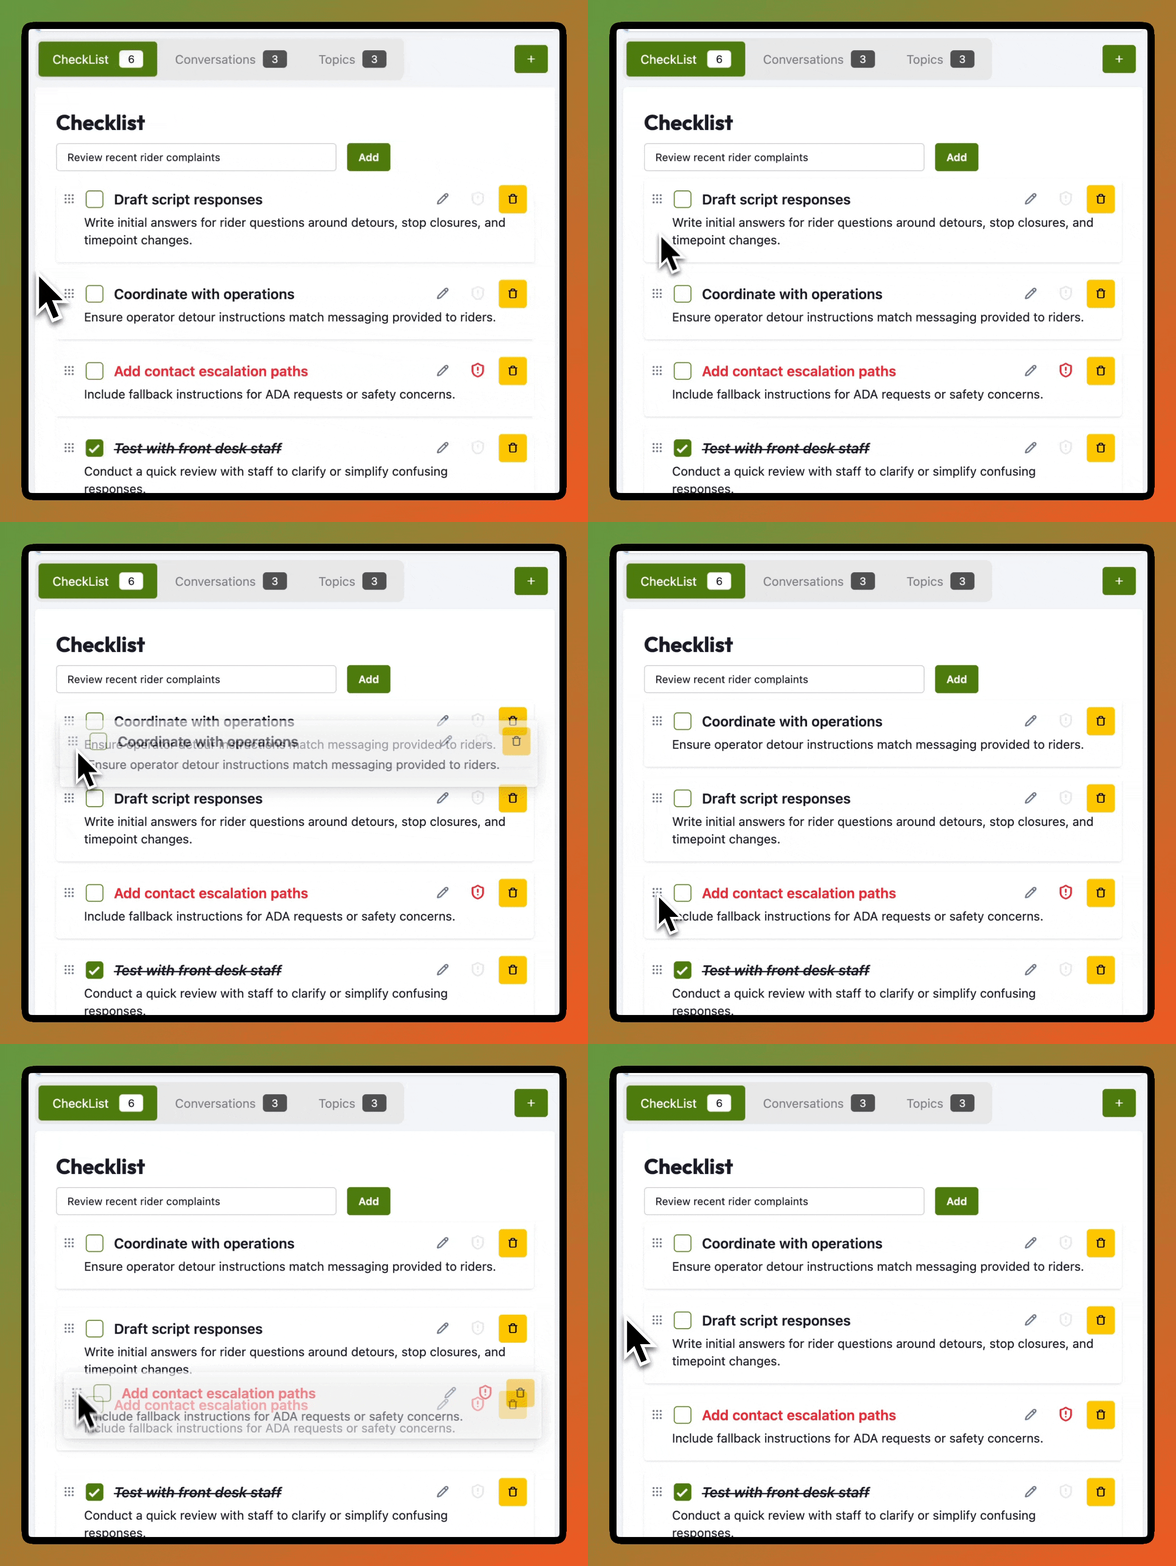
🔃 Reorder Tasks
- Want to change the order?
Just click and drag the handle on the left of any task to move it up or down the list.

✏️ Edit Task Details
Click the pencil icon ✏️ next to any task — or just click the task title.
You’ll be taken to the Todo Details page, where you can add:
Due dates
Assignees
Blockers or comments
And more...